Reviewsnap - Setting Up SAML Authentication
Reviewsnap can integrate with most single sign-on providers via SAML.
SAML (Security Assertion Markup Language) is an open-standard format for exchanging authentication and authorization data between an identity provider (your organization’s SAML provider) and a service provider (Reviewsnap). Reviewsnap can integrate with any SAML 2.0 identity provider to achieve a seamless login experience. Once users have authenticated with your organization’s identity provider, they are granted one-click access to Reviewsnap– simple, secure, and fast.
Single sign-on is an advanced Reviewsnap feature, and is only available within the Pro plan. If you would like to add this feature to your organization’s account, please contact us at help@reviewsnap.com.
There are four steps to setting up SAML authentication in Reviewsnap:
- Creating a SAML endpoint for Reviewsnap in your organization’s identity provider
- Configuring SAML within Reviewsnap
- Testing the configuration
- Enabling SAML authentication for all users
For specific instructions for configuring authentication with Azure Active Directory, click here.
1. Creating a SAML 2.0 endpoint for Reviewsnap
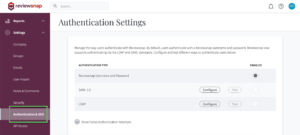
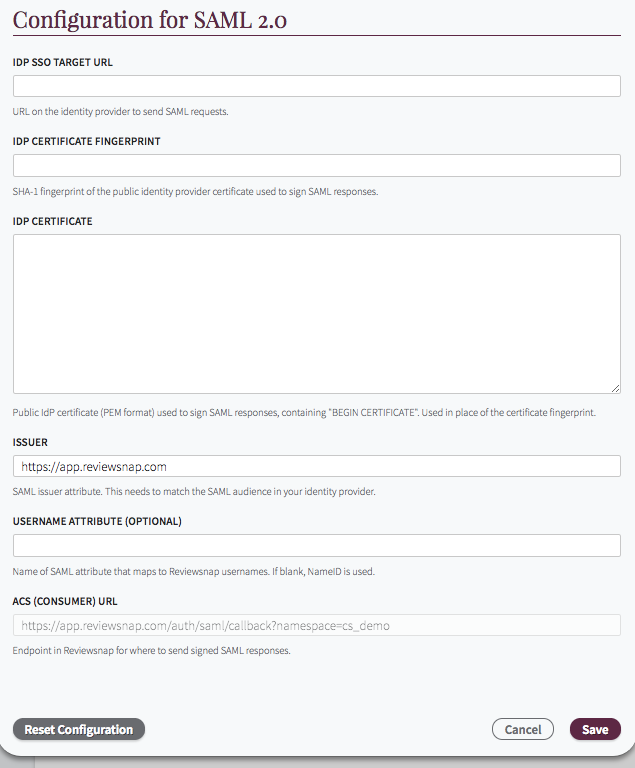
In order to set up the endpoint for Reviewsnap in your identity provider, you’ll need the following information from REviewsnap. Visit Settings > Authentication & SSO, and find:
ACS (Consumer) URL
A unique URL for your organization in Reviewsnap, where SAML responses should be sent.
Issuer (Optional)
Defaults to https://app.reviewsnap.com/. This can be changed if your SAML provider requires a different issuer, and should match the Audience attribute (if any) entered into your SAML provider.
Enter the above information into your identity provider to create an endpoint for Reviewsnap. Creating an endpoint varies significantly from provider to provider, and we will have more specific setup instructions for common providers soon.
2. Configuring SAML within Reviewsnap

Reviewsnap requires the following information from your identity provider to set up SAML:
IdP SSO Target URL
URL on your organization’s identity provider to send SAML requests.
Examples:
- https://myorganization.onelogin.com/trust/saml2/http-post/sso/813196
- https://app.onelogin.com/trust/saml2/http-post/sso/813197
- https://accounts.google.com/o/saml2/idp?idpid=X19padnba
IdP Certificate (fingerprint or full certificate)
If possible, copy the full public identity provider certificate used to sign SAML responses and enter into Reviewsnap. Alternatively, Reviewsnap supports using a SHA-1 fingerprint of the certificate. You only need to provide the full certificate or the fingerprint, not both.
The certificate should be in PEM format, starting with -----BEGIN.
The certificate fingerprint is case-insensitive, and can optionally include colons.
Examples:
- 95:68:CE:1E:7D:17:53:C5:FF:FD:8D:51:A0:D3:57:71:0F:A9:CC:05
- 95:68:ce:1e:7d:17:53:c5:ff:fd:8d:51:a0:d3:57:71:0f:a9:cc:05
- 9568ce1e7d1753c5fffd8d51a0d357710fa9cc05
Enter the above information into Reviewsnap, and proceed to the next step.

3. Testing the configuration
Follow the instructions to test the configuration in Reviewsnap, opening the provided URL in a separate browser or incognito window so that it’s not affected by your current session with our application.
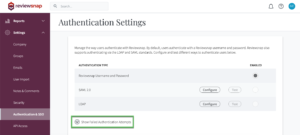
If sign in is not successful, you can click “Show Failed Authentication Attempts” from the Authentication Settings page to see more detailed error messages.

Here are some tips to resolve common issues with SAML:
CertificateError
The certificate used by your identity provider to sign the SAML response didn’t match the one entered into Reviewsnap. Double-check that you entered the certificate correctly, looking for:
- Extra lines before the BEGIN or after the END blocks
- Spaces on the end of lines
- The correct certificate. Some providers, like ADFS, use multiple certificates for different purposes. Make sure you’re using the one that is [b]used to sign SAML responses.
Fingerprint mismatch
The SHA-1 fingerprint of the certificate used by your identity provider didn’t match the one entered into Reviewsnap. Double-check that you entered the fingerprint correctly, looking for:
- A different type fingerprint. Reviewsnap requires the SHA-1 fingerprint, which is a 40-character hexadecimal string.
- A fingerprint of the wrong certificate. Some providers, like ADFS, use multiple certificates for different purposes. Make sure you’re using the one that is [b]used to sign SAML responses.
“X” is not a valid audience for this Response
Double-check that the “Audience” of the SAML endpoint within your identity provider matches the “Issuer” within Reviewsnap.
User has not been added to Reviewsnap
Automatically provisioning users can result in multiple accounts for the same user, or your users not having access to the right information – both which can be difficult to correct. For these reasons, Reviewsnap only authenticates users that have already been added to the application, and will not automatically create accounts for new users. Users can be added manually for smaller organizations, or using the User Import, for easier management of users in bulk.
If a user successfully authenticates with your chosen login strategy, but an account with that username (a.k.a “login”) cannot be found, they will receive a “User has not been added to Reviewsnap” error.
4. Enabling SAML authentication for all users
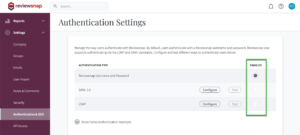
Once you have sufficiently tested the ability to log in via SAML, you can enable it for all users in your organization by selecting SAML as the enabled authentication type.

Once SAML is enabled as the way your users authenticate, you’ll notice the following changes in Reviewsnap:
- Passwords can no longer be set within Reviewsnap
- Users accessing Reviewsnap from your identity provider will be signed into the application.
- Users accessing Reviewsnap from our main login page will be redirected to your identity provider if their session expires, or if they type in your Company Name (and signed right in, if already authenticated with your identity provider)
- Users accessing Reviewsnap from links in Reviewsnap-generated emails will be redirected to your identity provider (and signed right in, if already authenticated with your identity provider)
You can also call us at 1 (800) 516-5849
.png)